♡Character Design♡

Our video will explain different anime styles and expression and also talking about where anime came from.

Why we chose this topic

I have always been into art, ever since I was little. You can see a lot of progress with my art. I have always been into drawing people more than other things and you can see how my style changed. When I was younger, I always tried to draw realistically, but now I am more into drawing cartoons. I found the cartoon anime style by watching anime and getting more and more into it. There are characters where I really like their futures and I started drawing them and starting getting better at drawing in this style. I learned that their personalities can really show in just a sketch and that is what I really liked about drawing anime characters.  I enjoyed creating characters, giving them personalities, and developing them.  I chose this topic to teach people how to draw these characters and all they need to do to get better is put in effort into the drawing. With more effort, you will start to see progress and that is one of my favorite things  to see how far along you have come in art. –Gabrielle Stedtfeld

I chose my 8th grade project as “Character Design” because I really enjoy watching cartoons and then drawing the cartoon characters. I like how they drew the different characters and that type of art style. Drawing the characters is relaxing and it keeps me at ease. I draw characters from cartoons using different style methods. I also think it’s much easier using a device(an iPad) to create my own characters. It’s so easy to do shading and color contrasting on a screen and being able to layer my drawings. If I make a mistake and can go to the layer and correct it. I will share my knowledge of character design on my web page and my classroom activities. –Lauren Rivera

On our website page we will be teaching how to draw a basic character and explain how to develop one. Also showing how to draw a character step by step.

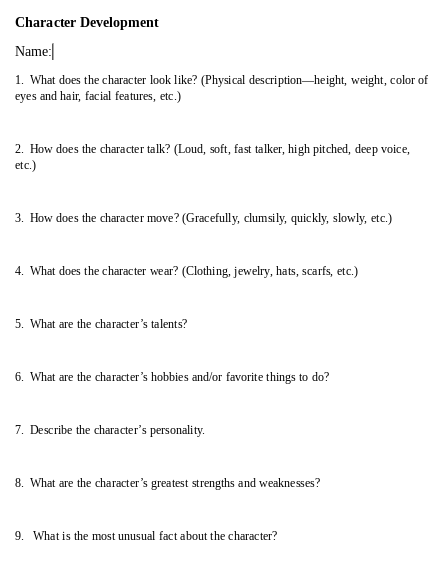
Character Development

To develop a character, instead of thinking of its physical traits, you should think about its personality. The personality traits can help you draw the character’s face. If your character is mean, you can draw a mean look on the character’s face. You can make your character’s personality mean or the opposite and give it a twist. The following is an example of a character drawing created from the character’s personality.

  • Example

Minamoto kou


Minamoto Kou, from the anime Toilet Bound Hanako-Kun, is one of the three main characters. His personality is very outgoing and loud; he is always trying to encourage the people around him. He is trying to be like his older brother and impress the family. However, he comes across Nene and Hanako and that kind of takes his mind off impressing his family. At first, he did not like Hanako, because Hanako is a spirit and Minamoto Kou’s family kills spirits. Minamoto Kou tried so much to be like his family, so he didn’t accept Hanako. But more into the series he starts to become friends with Hanako. Throughout this anime, you can see Minamoto Kou kind of change, but some things about his personality don’t change, like him being very outgoing and encouraging.

Character Drawing

To bring your character to life you need to draw the character. Remember to keep the character’s personality in mind, while you are drawing.  Following these steps can help you sketch out your idea on paper.

Intermediate drawing

  • The first step is to draw the circle to give a base the head.

  • The second step is adding the jawline.

  • The third step is adding guidelines for the eyes. 

  • The fourth step is drawing the right eye.

  • The fifth step is to draw the left one.

  • The sixth step is to add the outline of the ears.

  • The seventh is to add the details inside the ears.

  • The eighth step is adding the nose.

  • The ninth step is adding the mouth.

  • The tenth step is drawing the bangs.

  • The eleventh step is to add the outline of the hair.

  • The twelfth step is to erase the guidelines.

  • The thirteenth step is adding detail inside the hair. 

  • The fourteenth step is adding the neck.

The fifteenth step is the longer hair near the neck. 

  • The sixteenth step is adding the outline of his shirt.

  • The seventeenth step is adding the details and the collar.

  • The eighteenth step is adding his tie. 

  • The nineteenth step is adding a shadow to his neck. 

  • The twentieth step is adding his eyebrows and detail over his eyes. 

  • The last step is to darken around the eyes and choose to color it or not.

Primary drawing

  • The First step is to draw a shaped-like oval in the center of your paper.

  • The second step, draw a chin that connects to the head.

  • Add two lines, one down the middle and across the head

  • Draw eyes and eyebrows on each side.

  • Add ears on the head.

  • Draw two lines as the mouth.

  • Next draw the nose, only a simple line.

  • Start to erase the lines you created in the beginning.

  • Draw bangs on the head and near the ears.

  • Start to draw more hair around the head.

  • Lastly draw a neck and finish off erase any mistakes needed. Then your art work is complete.